
The Google Workspace support team at Wheaton would like to announce the upcoming rollout of Google disk usage quotas.
A few years ago Google lifted all disk usage quotas for individual users but during the summer of 2022 they changed their policy and implemented an institution-wide “pooled” quota. Because of this we are forced to set quotas at an individual level.
All new Wheaton constituents will have a 30 GB quota. This quota is a combination of the data you have in Gmail, Photos, and your own Google Drive. If you are currently at or over the 30 GB quota you will be given roughly 10 GB additional space. We will be rolling out these individual quotas during the fall 2022 semester.
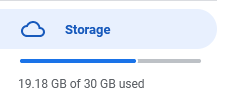
To see how much disk space you are using, log into Google and from the nine dots in the top right, also known as the “waffle”, select “Drive”. Your total disk usage will appear in the bottom left hand corner. Once a disk quota is set it will also show the amount of disk space you are using relative to your quota. Here is an example.
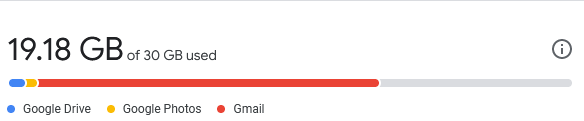
You can then click on the “Storage” area and in the center of the page it will give you a breakdown of your disk space usage. Here is an example.
If you find yourself nearing your disk space quota here are some helpful tips….
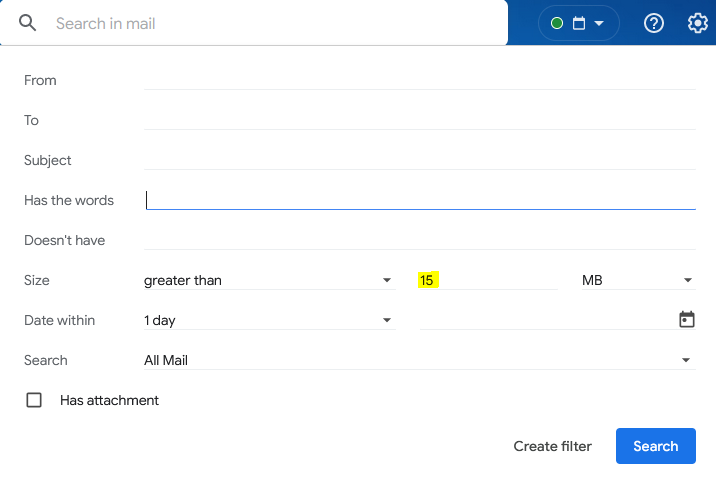
To decrease your disk usage in Gmail, select this highlighted filter option inside of the Gmail search bar

From the drop down menu, enter in “15” MegaBytes for the “size is greater than” option and click “Search” (see example below). 15 is a nice round number since email messages are capped at 25 MegaBytes. Review the messages it discovers and delete as necessary. Don’t forget to empty your Trash afterwards. Note: it can take up to 24 hours for the Gmail disk usage indicator to reflect the changes you have made. If necessary you can then search for smaller sized attachments (12 MegaBytes then 10 Megabytes etc.). Targeting email messages with large attachments is the quickest way to recover disk space.
Finding large documents inside of Google Drive is simple, once you have selected the “Storage” option on the left side of Google Drive, your Drive documents should appear in the center of the page sorted largest to smallest. You can right click on a file and select “Remove” then afterwards go into the “Trash” folder on the left and select “Empty Trash”. Like Gmail, it may take a while for your disk usage numbers to update within Google Drive although it typically updates faster than Gmail. Note: Only files/folders in your personal Google Drive count towards your disk quota, Shared Drive contents do not.
If you have any questions/concerns regarding this, please submit a ticket within the IT Support Services helpdesk system.